Zero-cost Cloudflare Custom Domain Email Tutorial: Build professional brand emails like [email protected] in 3 steps. Includes DNS setup guide, takes 10 mins for beginners, boosts trust for indie sites, blogs & SaaS products.
When running an independent website, personal blog, or SaaS product, are you still using personal email accounts like Gmail or Outlook for external communication? This actually hurts your brand professionalism significantly—imagine the trust gap when a customer receives a business email from [email protected] versus one from [email protected].
Today, I’ll share a zero-cost method to set up a custom domain email using Cloudflare. It takes less than 10 minutes total, and even beginners can follow along.
1. Prerequisites: What You’ll Need
There’s only one core requirement: a domain name already hosted on Cloudflare. If your domain isn’t transferred yet, simply add it on the Cloudflare official website and follow the prompts to complete DNS resolution migration (there are plenty of tutorials online, and it’s not difficult to operate, so I won’t go into detail here).
The image above shows my domain list in Cloudflare, where devresourcehub.com is the domain of this site.
2. Step-by-Step Guide: Set Up Custom Email in 3 Steps
My domain is devresourcehub.com (which is also the address of my blog). Next, I’ll use this domain as an example to set up a custom email like [email protected] step by step.
Step 1: Access the Domain’s Email Routing Page
After logging into Cloudflare, find the domain you want to set up in the domain list on the homepage (such as my devresourcehub.com) and click to enter the domain management backend. Locate “Email” – “Email Routing” in the left sidebar menu and click to enter the function page.
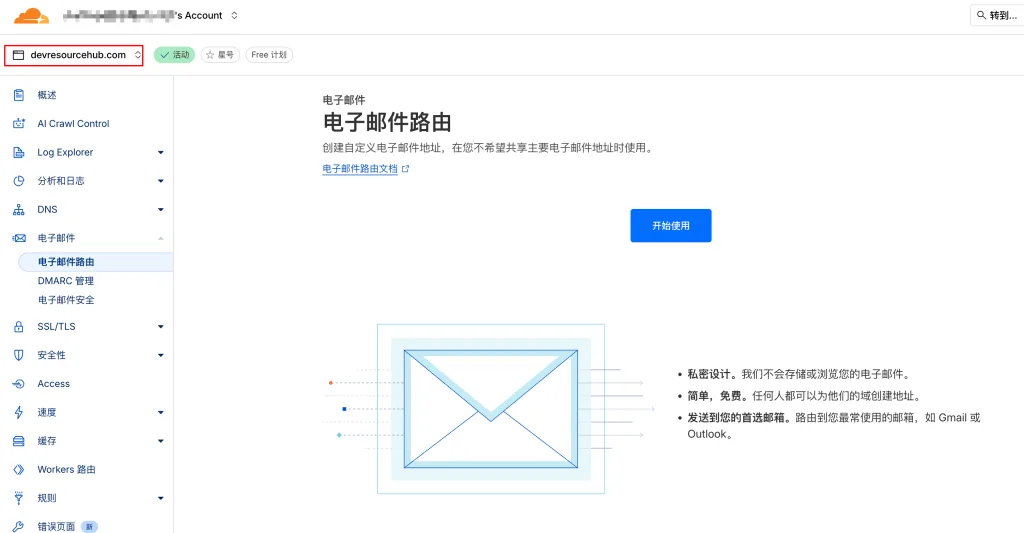
Step 2: Create a Custom Email Address
On the Email Routing page, click “Get Started” and fill in the relevant information in the subsequent form:
- Custom Address: Enter the email prefix. For example, if I want a dedicated contact email for the website, I’ll enter “contact”, and the final email will be [email protected]. For other types of emails, you can use common prefixes like your “name” or “support”.
- Action: Select “Send to email” (beginners can start with the basic forwarding function; advanced features like setting rules can be explored later).
- Destination: Enter your personal email (such as Microsoft Outlook or Gmail). All future emails sent to the custom email will be forwarded here.
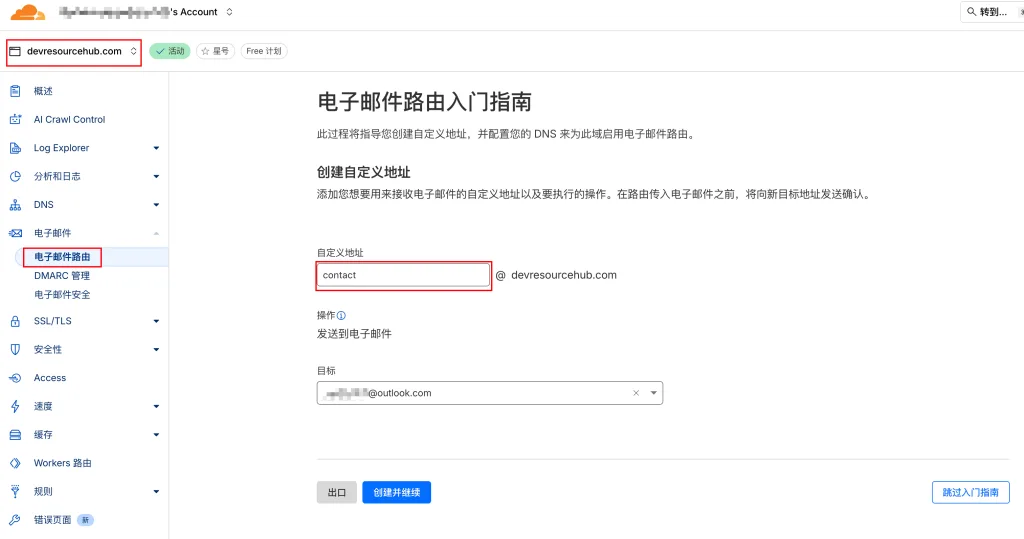
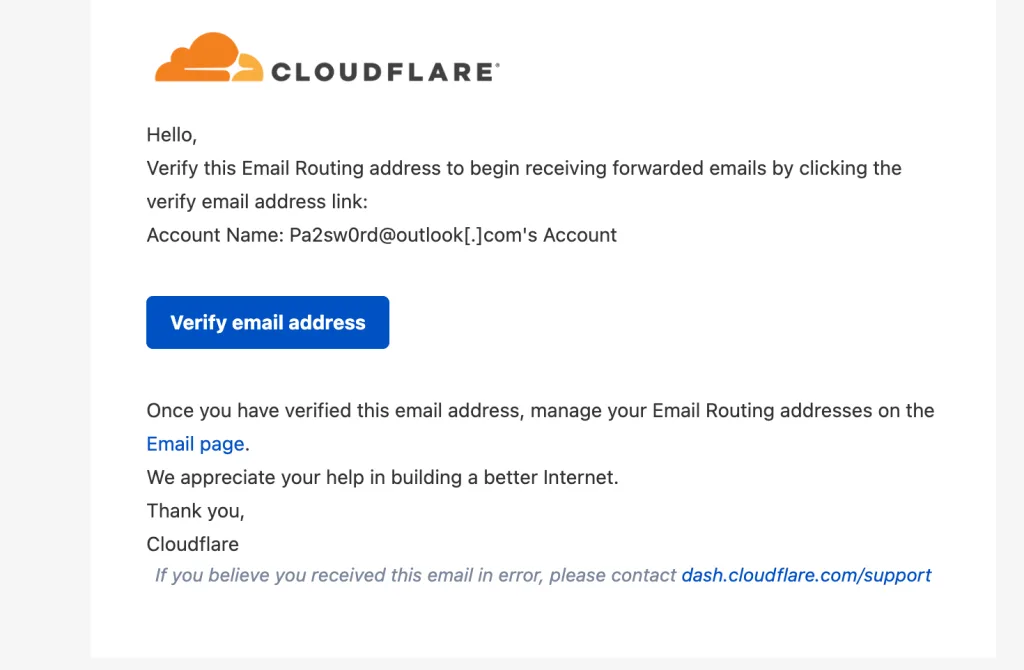
Step 3: Complete Email Verification and DNS Configuration
After clicking “Save”, Cloudflare will send a verification email to the destination email you entered. Open the email and click the verification link to confirm that the email can receive messages normally.
After verification, the system will prompt you to configure DNS records—don’t worry, Cloudflare has already generated the required records for you. Just click “Add records and enable” to complete the configuration automatically; no manual modification of DNS parameters is needed.
Since my destination email is the same as my Cloudflare account email, no verification was required, and it was set up directly.

3. Final Step: Test if the Email Works
After configuration, be sure to test it with another email (such as a friend’s email or another personal email): send an email to the custom domain email you just created (e.g., [email protected]) and then check if the destination personal email receives it.
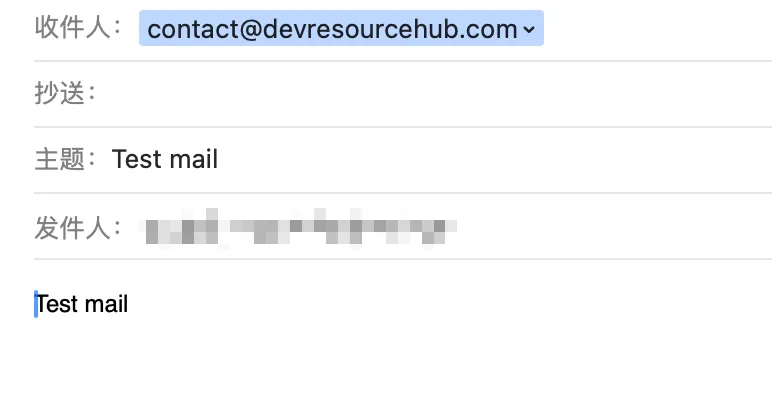
If it’s received normally, the entire process is successful. If not, first check if the DNS configuration has taken effect (there may be a 1-5 minute delay), then confirm the spam folder of the destination email.

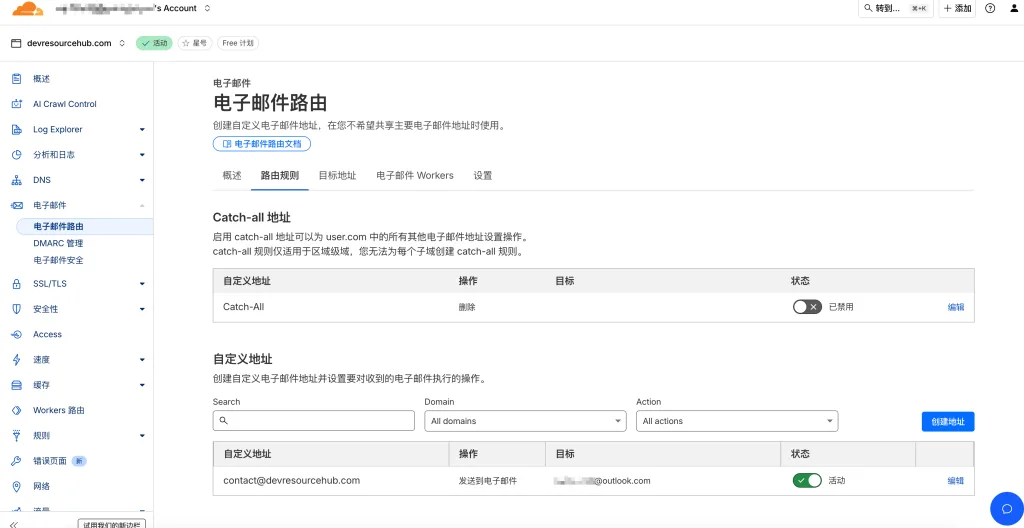
After testing, I found that forwarding works successfully, as shown in the image above.
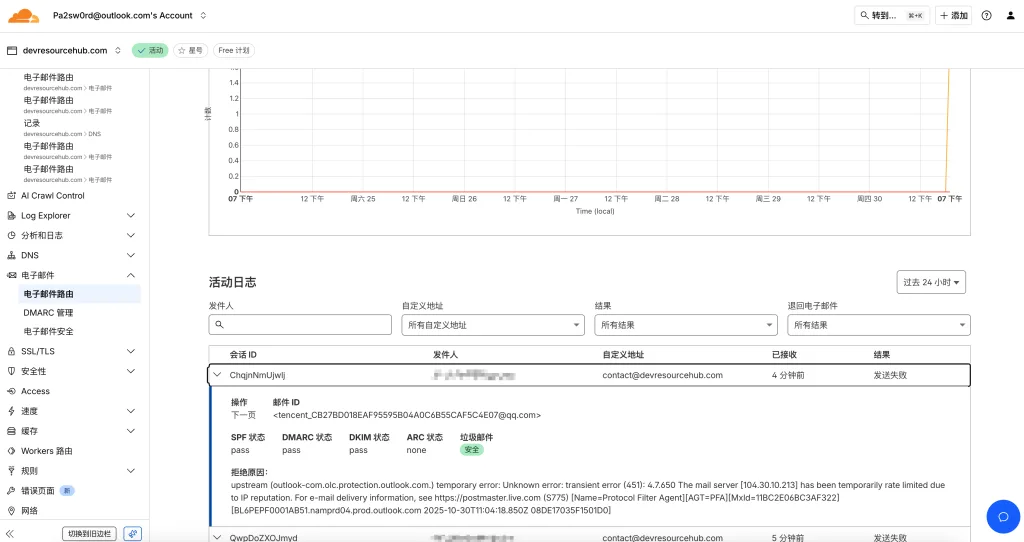
If you still can’t find the email even after checking the spam folder, you can check the logs in Cloudflare. For example, when I used a Microsoft email, the Microsoft email server added the IP of the forwarding email server to the blacklist, causing forwarding failure. The solution is either to contact the customer service of the destination email server or switch to another destination email.
Tips: If you want your custom email to send emails directly (not just receive and forward), you can pair it with Cloudflare’s SendGrid or other SMTP services. However, for most personal bloggers and small website owners, simple receiving and forwarding is sufficient.
In this way, you’ll have a professional brand email tied to your domain. Whether it’s for external communication, user feedback, or business cooperation, it can enhance your brand image and trust. The entire process is completely free and easy to operate—if you haven’t set it up yet, give it a try!
